
Creating the perfect workout space at home starts from the ground up literally. The foundation of every great home gym is the gym flooring you choose. Whether you’re lifting heavy weights, doing high-impact cardio, or following yoga routines, your floor plays a crucial role in safety, comfort, and noise reduction.
In this comprehensive step-by-step DIY guide, you’ll learn how to install gym flooring like a pro. We’ll cover everything from choosing the best flooring for home workouts to maintenance tips that keep it looking fresh for years.
Types of Gym Flooring
Before diving into the installation, let’s explore the types of gym flooring available. Each floor option serves different needs based on your space, equipment, and workout intensity.
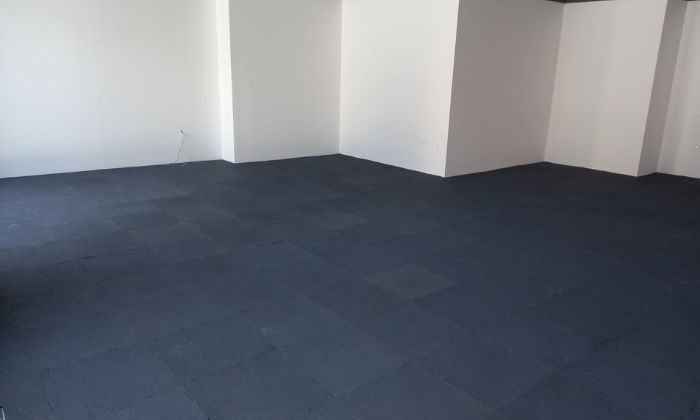
Rubber Tiles or Rolls
Rubber is the gold standard for rubber gym flooring. It’s durable, water-resistant, and can handle dropped weights and heavy equipment without denting or tearing. You can choose from:
- Rubber rolls: Ideal for larger areas, seamless, and easy to install.
- Rubber flooring tiles: Great for modular setups and can be replaced individually if damaged.
Rubber also helps to reduce noise, especially important in high traffic areas like apartment buildings or shared spaces.
Foam Mats
Foam mats are ideal for low-impact workouts like Pilates or stretching. Lightweight and cushioned, they often feature interlocking edges for easy setup. While comfortable underfoot, they aren’t suitable for heavy weights or gym machines, as they can compress or tear easily. Best used in home gyms focused on bodyweight training or floor-based exercises.
Vinyl Flooring
Vinyl flooring offers a sleek, polished finish for home gyms. It’s water-resistant, easy to clean, and stylish making it great for spaces that serve multiple purposes. However, it doesn’t provide the same cushioning as rubber or foam, so it’s better suited for light workouts or areas that also function as living or entertainment zones.
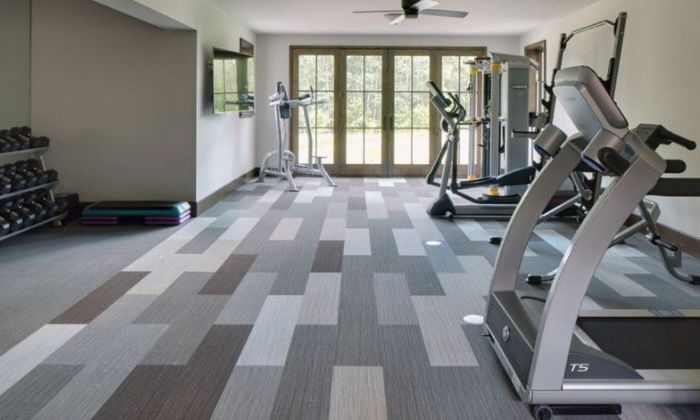
Carpet Tiles
Carpet tiles offer a warm, cushioned feel and are simple to install or replace. They’re ideal for light-use home gyms but not suited for heavy lifting or sweaty environments, as moisture and impact can wear them down quickly. Choose them if comfort and ease of maintenance are priorities over durability and resistance to gym-related stress.
Tools and Materials You’ll Need
To ensure a smooth DIY gym flooring setup, gather the following:
- Measuring tape
- Utility knife or straight edge cutter
- Chalk line or marker
- Rubber mallet (for interlocking tiles)
- Adhesive (for vinyl or rubber rolls, if needed)
- Moisture barrier (plastic sheeting)
- Cleaning supplies (broom, mop, vacuum)
- Gloves and knee pads for protection
Preparing the Subfloor
Clear the Room
Clear the room by removing all gym equipment, weights, and furniture. This creates a blank, open space, making it easier to inspect the subfloor and plan your gym flooring installation. Starting fresh ensures nothing gets in the way and helps you accurately measure, clean, and prepare the surface for a smooth and secure flooring fit.
Clean the Surface
Clean the surface thoroughly using a broom, mop, or vacuum to eliminate dust, dirt, and debris. Any leftover particles can interfere with adhesive bonding and cause uneven flooring. A clean base ensures proper installation and a smooth, durable finish. Don’t skip this step; it’s essential for long-lasting gym flooring performance.
Inspect and Repair
Inspect the subfloor carefully for cracks, holes, or uneven spots. Repair any damage by filling gaps and sanding rough areas. This step ensures a smooth, level surface, providing a secure foundation for your gym flooring. Proper preparation helps the flooring last longer and prevents issues like shifting, wear, or discomfort during workouts.
Moisture Barrier
If you’re installing gym flooring over concrete especially in basements or garages use a moisture barrier. It blocks water from seeping up, protecting your mats from mold, mildew, and odors. This extra layer helps maintain the durability and hygiene of your gym floor, ensuring a longer lifespan and a cleaner, safer workout environment. Use it if dampness is a concern.
Step-by-Step Installation Guide
Ready to get hands-on? Let’s walk through how to install gym flooring from start to finish.
Measure and Plan Layout
Before cutting, measure the room carefully and plan the gym flooring layout. Begin placing interlocking mats from one corner, working outward to achieve a snug, consistent fit across the space. Proper planning ensures minimal waste, better aesthetics, and a secure, stable surface for workouts.
Cut Flooring to Fit
Cut the gym flooring to fit perfectly around corners, doorways, and fixtures using a utility knife and straight edge. Precise cuts ensure a clean, professional look. Always measure twice before cutting to avoid costly mistakes and material waste. Proper fitting enhances durability, appearance, and safety, especially in high-use areas or irregularly shaped spaces.
Lay the Flooring
- Rubber tiles: Connect the rubber matting like puzzle pieces, pressing edges firmly together.
- Rubber rolls: Roll out the flooring carefully. Let it sit for a day if curled at the edges.
- Foam mats: Snap together like a jigsaw puzzle.
- Vinyl or carpet tiles: Lay in the planned pattern.
Ensure tight seams to prevent tripping hazards and protect the gym floor mats from lifting over time.
Apply Adhesive
For permanent or semi-permanent installs (like rubber rolls or vinyl flooring), you may need adhesive:
- Apply evenly using a trowel.
- Press flooring down firmly.
- Allow curing time based on the adhesive instructions.
Adhesive is especially useful for high traffic areas or commercial-grade setups.
Final Touches
Trim edges for a clean look, and install baseboards or transition strips if needed. Replace your exercise equipment, making sure to use mats under heavy equipment to prevent denting or tearing.
Tips for a Professional-Looking Finish
Want your home gym floor installation to look like it was done by a pro? Here are expert tips:
- Let materials acclimate: Let rubber or foam tiles sit in the room for 24–48 hours before installation to adjust to the temperature and humidity.
- Stagger seams: Like in hardwood installation, staggering seams in rubber tiles creates a cleaner visual effect and improves stability.
- Use a rubber mallet: This helps lock tiles into place without damaging them.
- Mark layout lines: Use a chalk line to guide straight placement, especially important with rubber rolls or tiles.
These rubber flooring installation tips elevate your setup and reduce installation headaches.
Maintenance and Care
Installing gym flooring is only part of the equation. To get the most from your new rubber gym flooring, consistent maintenance is key.
Daily and Weekly Cleaning
- Foam or vinyl floors: Use a damp mop and gentle cleaner.
- Rubber flooring tiles or rolls: Vacuum regularly and mop with a neutral pH cleaner to avoid residue build-up.
- Carpet tiles: Vacuum daily, and deep clean once a month.
A clean workout space is not only more hygienic but also safer.
Avoid Dragging Equipment
Dragging heavy equipment can damage your gym flooring by tearing foam, scratching vinyl, or scuffing rubber mats. To prevent this, always lift items instead of sliding them. If lifting isn’t possible, use furniture sliders or protective padding underneath. This simple precaution helps extend the life of your flooring and maintains its clean, professional appearance.
Inspect Periodically
Inspect your gym flooring every few weeks for signs of wear and tear. Look closely for peeling edges, gaps between tiles, or uneven sections especially with modular flooring. Catching minor issues early can prevent bigger problems later, ensuring safety and prolonging the life of your gym floor with minimal maintenance.
Use Mats Under Heavy Equipment
Place thick mats beneath heavy gym equipment like treadmills and benches to protect your flooring. Even tough rubber can compress over time under constant weight. Mats help distribute pressure, reduce wear, and extend the life of your gym floor, making them a smart investment for long-term durability and performance in your workout space.
Conclusion
Installing gym flooring on your own might seem like a challenge, but with the right tools, materials, and guidance, it’s entirely achievable and rewarding. Whether you go for rubber tiles, interlocking gym mats, or stylish vinyl, your floor will transform your workout space into a safer, quieter, and more motivating zone.
A successful DIY gym flooring setup isn’t just about protecting your floor; it’s about protecting your body and your investment in fitness. From high impact activities to heavy weights, your choice of flooring should reflect your goals and lifestyle.