
Installing a fence is more than just a home improvement, it’s a transformation. Whether you’re securing your property, enhancing privacy, or increasing curb appeal, fence installation can completely change how you feel about your home. But before a single post goes into the ground, proper preparation is key. Mistakes here can lead to costly delays, utility hazards, or even legal trouble.
If you’re dreaming of a safe, beautiful, and durable fence, this emotionally engaging guide will walk you through every essential step. From checking local laws to leveling your yard and choosing materials, we’ll cover everything in detail so your fence installation project starts strong and finishes flawlessly.
Check Local Regulations and Permits
Before you grab a shovel or start browsing fence styles, make sure you’re legally in the clear. Local zoning laws often dictate what kind of fence you can install, how high it can be, and even what materials are permitted. In some areas, homeowners’ associations (HOAs) have additional restrictions.
Skipping this step is tempting but it’s a time-consuming mistake to fix later. You may need to remove or redo the entire fence. Visit your local building department, check your HOA rules if applicable, and apply for the necessary permits well in advance.
If the rules feel overwhelming or unclear, hiring a professional surveyor or contractor can save you major headaches down the road.
Confirm Property Lines
One of the most cost-effective ways to avoid disputes with neighbors is to check your property boundaries carefully. Don’t assume where your yard ends especially if you’re replacing an old fence or following an existing tree line. Incorrect assumptions could mean building on someone else’s land.
Use a property boundary check through your land survey or property deed. If you’re unsure, request an updated survey. Some companies even offer drone inspection services for high-resolution, real-time mapping of property lines.
For extreme accuracy, modern surveying tools create point clouds and detailed images of your land, ensuring every post falls exactly where it should. This step is crucial for data collection and legal safety.
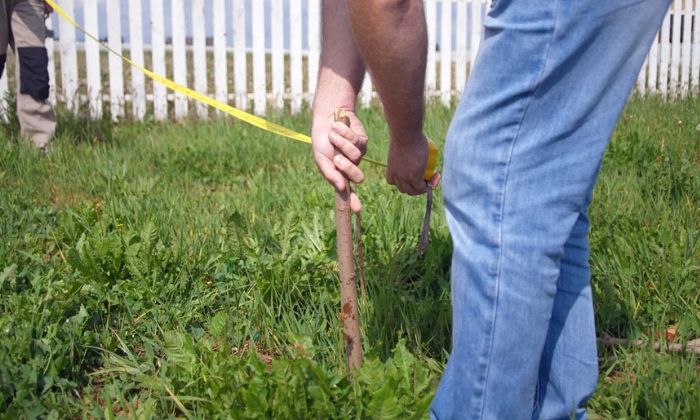
Mark the Fence Line
Now that your property lines are confirmed, it’s time for fence line marking. This is the blueprint of your project, getting it right sets the tone for a smooth installation.
Use string lines and stakes to outline the entire path of the fence, including gate placement and access points (more on that later). This not only helps visualize the final look but also lets you spot early issues like sharp angles or tight corners.
A common error at this stage? Ignoring terrain changes. If your yard is sloped, you’ll need to account for yard leveling tips or step-down designs.
Locate and Mark Utility Lines
Utility line inspection is one of the most critical safety steps in fence preparation. Digging without knowing what lies beneath your lawn can lead to dangerous and expensive accidents cutting a water line, gas line, or even damaging your local power grid.
Call your local “Call Before You Dig” service to have underground lines marked for free. Utility companies use different colored flags or paint to show you exactly where not to dig.
With advanced powerline inspections using thermal imaging and high-quality mapping tools, professionals can spot underground cables and pipes with surgical precision. Don’t risk it, get your lines marked and avoid a costly, dangerous mistake.
Clear and Level the Yard
Once the lines are marked, it’s time to prep your yard for action. Obstruction removal for fencing includes pulling out rocks, trimming overgrown bushes, removing tree stumps, and getting rid of anything else that might block your fence’s path.
A level yard ensures the fence is even and stable. Uneven ground can lead to gaps at the bottom, poor gate function, and structural stress.
Use a shovel and rake to smooth high spots and fill in dips. If the yard is large or has significant slopes, renting a skid steer or hiring a landscaper might be more efficient.
And don’t forget to check the grass. If it’s growing wild along the fence line, mow it short. Grass growing too close to your posts can lead to rot and makes maintenance harder.
Plan for Gate Placement and Access Points
A fence without a gate is like a car without a door you need access. Think carefully about gate placement and access points. Will you need to bring in large equipment or landscaping tools? Do kids or pets need a path in and out?
Strategically placed gates improve flow, convenience, and even resale value. Double-check that your gate area is free of obstructions and has level ground. It’s much easier to fix these issues now than after the concrete is poured.
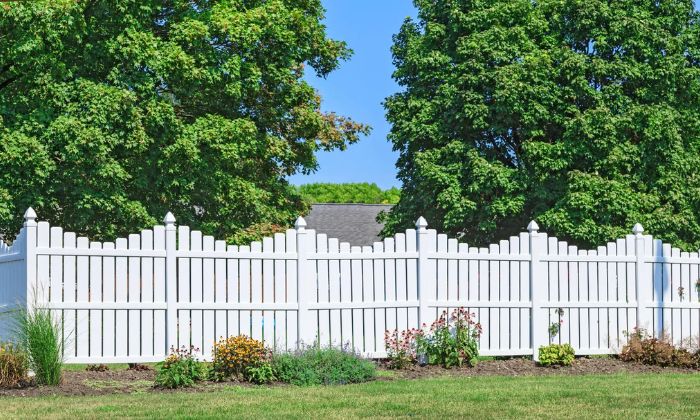
Choose the Right Fence Type
Your choice of fence says a lot. Do you want privacy, security, or just a decorative boundary? Popular types include:
- Wood – natural and customizable
- Vinyl – low maintenance and clean look
- Metal – durable and secure
- Chain link – budget-friendly and quick to install
Also consider the purpose are you trying to contain pets, block nosy neighbors, or enhance curb appeal? Don’t just go with what looks good. Ask about local weather resistance, maintenance needs, and material warranties.
Fence installation is a long-term investment. Choosing the wrong type can be time-consuming and expensive to replace later.
Prepare Tools and Materials (If DIY)
Planning a DIY project? Then it’s time to gather your gear. A smooth fence installation relies on having everything you need before you start.
Here’s a basic checklist:
- Post hole digger or auger
- Shovel and level
- Tape measure and chalk line
- Screws, nails, or fasteners
- Fence panels or pickets
- Concrete mix
- Safety gear (gloves, goggles, boots)
Don’t underestimate how physically demanding this can be. Digging dozens of holes, lifting panels, and aligning posts isn’t light work. Consider renting tools like a power auger or cement mixer to save your back and your weekend.
Final Walkthrough Before Installation
Take one last lap around your yard. This final walkthrough is your chance to catch anything you missed: a forgotten tree root, an unmarked utility line, or a slight slope that could affect the fence.
Double-check your fence line marking, confirm all permits are approved, and review the location of your property boundary and gates. If you’re using a contractor, walk through the entire plan with them and ask questions. Good communication prevents bad surprises.
Some pros use drone inspection for this final sweep, capturing high-resolution visuals of the property. These detailed images are useful for ensuring the entire inspection process is complete before the first post is set.
Conclusion
Fence installation isn’t just about putting up boards and nails, it’s about preparation, precision, and purpose. From checking local zoning laws and utility line inspection, to careful property boundary checks and choosing the right materials, every step is part of a bigger picture: creating a safe, functional, and beautiful outdoor space.
Taking the time to prepare your yard sets you up for long-term success. It’s more than a project, it’s a promise to yourself, your family, and your home.
So whether you’re going the DIY route or hiring professionals, make every step count. A well-prepped yard leads to a fence that stands strong for years to come protecting, enhancing, and transforming your space.