
When it comes to creating a safe, vibrant, and engaging play area, Outdoor Playground Flooring Installation is the foundation of it all. A well-installed playground surface is not just about looks it’s about protecting children, ensuring long-term durability, and meeting safety standards. From shock absorption to weather resistance, the right flooring can make all the difference in providing a worry-free, fun environment for kids. Whether you’re a school, park, daycare, or homeowner, following a precise installation process will guarantee that your playground remains safe and attractive for years to come.
Let’s dive into this step-by-step Outdoor Playground Flooring Installation guide, packed with practical tips, emotional hooks, and clear directions to help you build a safe and beautiful play area that brings joy and peace of mind.
Assessing the Playground Area
Before beginning the installation process, it’s essential to thoroughly assess the playground area to set the foundation for success. This first step involves evaluating the size, shape, slope, and current condition of the surface. Understanding the playground surface preparation requirements, local weather conditions, and the amount of expected foot traffic will guide the entire process. Consider obstacles like trees, drainage systems, and adjacent equipment. A proper assessment not only ensures a smooth installation but also significantly impacts the long-term performance and safety of the flooring.
Selecting the Right Playground Flooring Material
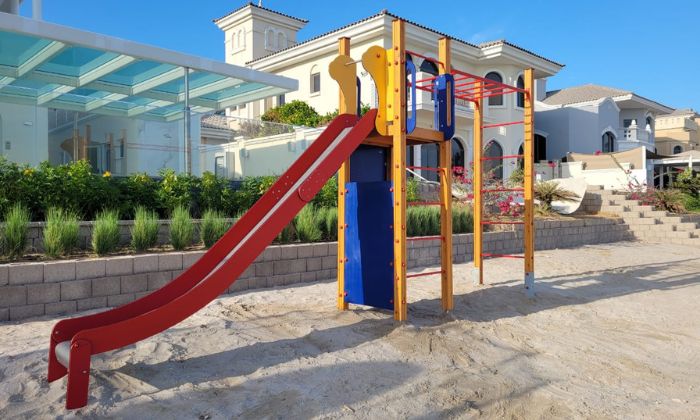
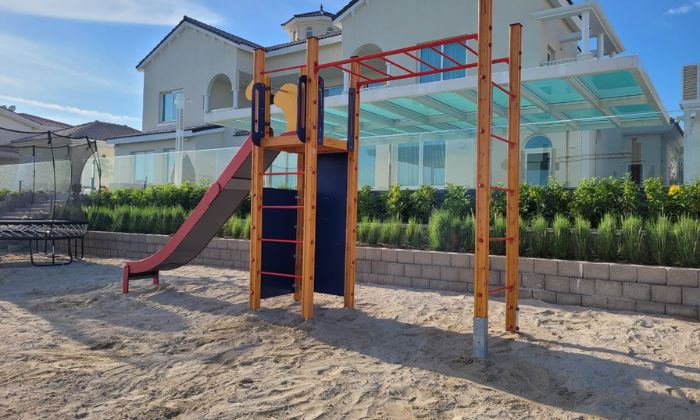
Choosing the perfect playground flooring material is critical for safety and enjoyment. With a wide range of flooring options available, you can select from rubber playground tiles, pour-in-place rubber, artificial grass, or loose fill surfacing like rubber mulch. Each option offers unique benefits. Rubber floors, particularly rubber tile and recycled rubber surfaces, provide excellent shock absorption and are highly durable. Pour-in-place rubber offers a seamless, customizable surface that adapts to any design and delivers exceptional safety with a critical fall height advantage. Artificial grass adds a natural feel with low maintenance, while rubber mulch is soft, colorful, and budget-friendly. When selecting your material, always prioritize safety flooring for playgrounds that meet industry safety standards to protect children from serious injuries.
Preparing the Ground Surface
The next critical step is playground surface preparation. A well-prepared base ensures the longevity and performance of your flooring. Start by clearing the area of debris, rocks, roots, and any uneven ground. Compact the soil to create a stable base, making sure it’s level to prevent future sinking or shifting. Depending on the flooring you choose, you may need to add a playground base layer material like crushed stone or compacted gravel to enhance drainage and stability. This step is the unsung hero of the installation—it’s not visible, but it’s what keeps everything together.
Installing the Base Layer
Installing a proper base layer is a non-negotiable step in the Outdoor Playground Flooring Installation process. The base acts as a cushion and support, absorbing minor movements and providing essential drainage. For rubber playground tiles and pour-in-place surfaces, a compacted crushed stone or gravel base is typically recommended. For artificial grass or mulch, a layer of sand or fine gravel can help stabilize the surface. Ensuring that your base is well-compacted and level is key to maintaining a smooth, durable playground surface that withstands heavy use and changing weather conditions over the long term.
Installing Playground Flooring
Once your base layer is in place, it’s time to bring your playground to life by installing the flooring. The installation process varies depending on the material you choose, but every step should be completed with care and attention to detail to ensure maximum safety and longevity.
For Rubber Tiles
When working with rubber playground tiles, precision is essential. Start by carefully aligning the tiles from one corner of the playground, working row by row. It’s crucial to secure the tiles properly using adhesive or interlocking systems to prevent shifting. Pay special attention to sealing the joints between tiles to eliminate gaps that could cause tripping hazards. This meticulous approach not only meets safety standards but also enhances the durability and appearance of your playground.
For Poured-in-Place Rubber
The rubber flooring installation steps for pour-in-place rubber create a seamless, vibrant surface that’s perfect for custom designs and intricate shapes. The process starts by mixing the rubber granules and binder on-site, ensuring the mixture is uniform. Once mixed, the material is poured over the prepared base and carefully spread and smoothed using trowels. Consistency is key here to maintain the correct depth that supports shock absorption and meets the critical fall height required for your playground equipment. The result is a soft, safe, and visually stunning surface that kids will love and parents will trust.
For Artificial Grass or Mulch
If you’ve chosen artificial grass or rubber mulch as your flooring options, the installation process is slightly different but equally important. For turf, roll out the grass over the base layer, trim it to fit perfectly, and secure the edges using stakes or adhesive. The goal is to prevent any movement or curling that could compromise safety. For loose fill surfacing like rubber mulch, spread the material evenly across the area, ensuring you maintain adequate depth for shock absorption and protection. Always check that the fill level meets safety flooring for playgrounds requirements to minimize injury risks.
Securing Edges and Borders
Properly securing the edges and borders of your playground surface is essential to prevent material displacement and maintain a clean, professional look. Borders not only keep mulch and loose materials contained but also provide a clear boundary that helps guide foot traffic and enhances the playground’s visual appeal. Use high-quality edging materials that can withstand weather conditions and heavy use. Securing the edges tightly ensures the playground surface remains intact and reduces maintenance over time.
Final Safety Checks
Once the installation is complete, thorough safety checks are necessary to guarantee a secure and hazard-free environment. Inspect the entire playground surface for gaps, loose tiles, uneven areas, or sharp edges. Measure the surface depth to confirm it meets safety standards and offers sufficient shock absorption for the equipment’s critical fall height. Check the stability of borders and verify that all materials are securely fastened. This final walkthrough is your chance to make sure everything is perfect before children step foot on the playground.
Post-Installation Maintenance Tips
Even the most highly durable playground surfaces need regular care to stay safe and attractive. Follow these essential outdoor flooring maintenance tips to prolong the life of your investment. First, perform routine inspections for wear and tear, looking for cracks, thinning areas, or displaced materials, especially after storms or heavy use. Cleaning is also crucial—sweep or rinse rubber floors regularly to prevent debris buildup and ensure the surface remains slip-resistant. For poured-in-place rubber, periodic resurfacing may be necessary to maintain safety and appearance. If you’ve chosen loose fill surfacing like rubber mulch, always monitor the fill levels and replenish as needed to maintain proper depth and protection. By staying proactive with maintenance, you’ll keep your play area safe, clean, and enjoyable for years.
Conclusion
In the end, Outdoor Playground Flooring Installation is more than just laying down materials—it’s about building a joyful, secure, and welcoming environment where children can explore, laugh, and grow safely. From initial playground surface preparation to the detailed installation process and post-installation care, every step plays a crucial role in the success of your playground. Whether you choose rubber tile, pour-in-place rubber, artificial grass, or rubber mulch, always remember that high-quality materials, precise execution, and diligent maintenance are key to long-term satisfaction. Don’t settle for less when it comes to creating a safe haven for play. Make the right choices, follow these expert steps, and watch your playground become a cherished space filled with happy, active children. Your thoughtful investment in Outdoor Playground Flooring Installation will bring priceless smiles and peace of mind for years to come.