
EPDM Flooring Installation has become one of the most trusted methods for creating durable, safe, and visually appealing flooring surfaces in playgrounds, gyms, recreational areas, and even commercial and residential projects. Whether you’re building a child-friendly outdoor playground, upgrading high traffic areas in a school, or installing a cost-effective flooring solution for a fitness center, EPDM rubber flooring is a popular choice because of its long-term benefits, versatility, and ability to reduce the risk of accidents.
If you’re considering this flooring option, it’s important to understand the complete installation process. A proper installation not only ensures longevity but also makes the surface easy to clean, low-maintenance, and capable of withstanding heavy use. This guide will walk you through the entire EPDM rubber mat installation process—from preparation to finishing touches—so you can achieve professional results with confidence.

Step-by-Step Process
Tools and Materials Required
Before starting the installation process, gather all necessary tools and safety flooring materials. Having the right equipment ensures smooth progress and avoids delays. Typically, you’ll need:
- EPDM rubber tiles or rolls
- Adhesive suitable for synthetic rubber
- Trowel or roller for applying adhesive
- Measuring tape and chalk line for accurate layout
- Utility knife or heavy-duty scissors for cutting floor tiles
- Double sided tape (for temporary or light-use installations)
- Cleaning supplies for surface preparation
These materials are essential for both commercial and residential projects, making the installation process more efficient and precise.
Preparing the Surface
Surface preparation is the foundation of successful EPDM surface installation. The flooring surface must be clean, dry, and level. Any debris, dust, grease, or moisture left behind can compromise adhesion, leading to premature wear and tear.
- Start by sweeping and washing the area thoroughly.
- Repair cracks, holes, or uneven sections before proceeding.
- Ensure the base is completely dry, as installing on damp surfaces is one of the most common mistakes to avoid.
Proper surface preparation ensures the EPDM flooring bonds effectively and performs well in high traffic areas over the long term.
Measuring and Planning Layout
The planning stage determines how seamless your rubber flooring installation steps will be.
- Measure the entire area carefully.
- Use chalk lines to create a clear layout.
- Arrange rubber tiles or rolls temporarily before applying adhesive to see how they fit.
This step helps minimize waste, ensures proper installation, and guarantees that your flooring solution looks uniform and professional. Planning ahead is especially important when working with outdoor playground flooring installation, where safety flooring must be precise to reduce the risk of tripping.
Applying Adhesive
Once the surface preparation and layout are complete, it’s time to apply adhesive.
- Choose an adhesive specifically designed for synthetic rubber flooring. Using the wrong adhesive can lead to peeling or bubbling.
- Apply the adhesive evenly with a notched trowel or roller.
- Follow manufacturer instructions for drying time before laying the EPDM flooring.
For smaller projects or temporary installations, double sided tape can be used as an alternative, though it won’t offer the same durability as adhesive.
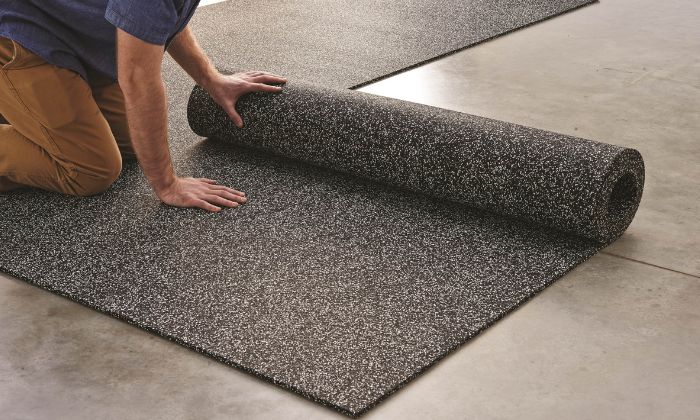
Installing the EPDM Flooring
Now comes the most rewarding part of the installation process—laying down the EPDM rubber tiles or rolls.
- Carefully place each section according to your planned layout.
- Press firmly to ensure strong adhesion.
- Use a roller to smooth out air bubbles and ensure even contact with the adhesive.
- Trim edges with a utility knife for a precise fit.
This stage requires patience and attention to detail. Whether you’re installing floor tiles in a gym or rubber rolls in an outdoor area, proper installation guarantees a seamless, professional finish.
Sealing and Finishing Touches
After the flooring surface is fully installed, sealing may be required depending on the product. A sealant helps protect against moisture, UV rays, and wear, especially in outdoor playground flooring installation.
Finishing touches also include inspecting the entire area, ensuring joints are tight, and cleaning off any excess adhesive. These details not only enhance appearance but also extend the long-term durability of your safety flooring.
Curing and Drying Time
One of the most overlooked aspects of EPDM rubber mat installation is allowing adequate curing time. Rushing this stage can undo all your hard work.
- Allow the flooring to cure as per manufacturer guidelines—typically 24 to 72 hours.
- Avoid foot traffic or placing heavy equipment until the surface is fully cured.
Patience here ensures your flooring option remains intact for years, especially in high traffic areas like gyms, playgrounds, and commercial spaces.
Post-Installation Maintenance Tips
Even with proper installation, regular care is essential to maximize the lifespan of your EPDM flooring.
Cleaning Guidelines
EPDM flooring is easy to clean, making it a cost-effective choice for busy facilities. Simply sweep debris and mop with mild detergent as needed. For outdoor areas, a hose or pressure washer can be used for quick cleaning.
Regular Inspections and Minor Repairs
Check your flooring surface periodically for signs of wear or damage, especially in high traffic areas. Promptly repairing small issues—like lifting edges or minor tears—prevents them from becoming larger problems.
Extending Lifespan of EPDM Flooring
Avoid dragging heavy equipment across the flooring, and place protective mats under sharp or heavy objects. With proper installation and consistent care, EPDM rubber flooring can last many years, making it a long-term investment.
Common Mistakes to Avoid
Even the best flooring solution can fail if mistakes are made during installation. Here are some pitfalls to watch out for:
- Installing on uneven or damp surfaces: This weakens adhesion and causes early failure.
- Using the wrong adhesive: Always use adhesive designed for synthetic rubber materials.
- Not allowing adequate curing time: Cutting corners on drying time reduces durability.
By avoiding these mistakes, you’ll ensure your EPDM flooring installation process delivers safe, long-lasting results.
Conclusion
When done correctly, EPDM Flooring Installation transforms spaces into safe, durable, and attractive environments. From gyms and playgrounds to commercial and residential projects, this flooring option offers a cost-effective, long-term solution that’s easy to clean, resistant to wear, and designed to reduce the risk of slips and injuries.
The key lies in following each step carefully—from surface preparation and adhesive application to proper curing and ongoing maintenance. Avoiding common mistakes ensures that your safety flooring materials remain a reliable flooring surface for many years.